
Build 3
Shipped: 2023.01.18
The Translation Workflow
Primarily, the translation workflow is implemented using these two applications.
- The Translation website xlate.metamation.com, deployed in the cloud.
- And the command line application XL.exe, installed locally on the translation owner’s1 computer.
The Web application is used by the authors and administrators:
- To create/update translations for various Locales2.
- To update the section images for various translation Pages3.
- To administer the translation services by creating new accounts, updating account roles etc.
And the CLI application is used by the translation owners and the product developers:
- To seed the initial remote translation database from the local translation dictionaries.
- Update the remote translation database with the new/updated phrases from a new release.
- Pull the remote translation updates and synchronize the local dictionaries.
- Download the updated/new section images from the remote to the local repositories.
- Query the translation phrases (code ⇨ text and text ⇨ code)
- Check various lists and stats.
The web application also provides the authenticated APIs which the xl.exe application uses to implement the command interface.
Rest of this document describes the translation workflow walkthrough with the Praxis translation database. The workflow steps:
- Create a user account.
- Initialize the translation database from the local dictionaries.
- Create/update translations.
- Download and apply (get) the updated translation to the local dictionaries.
- Update remote database with the phrases from a new release.
Setting up the application for the first use
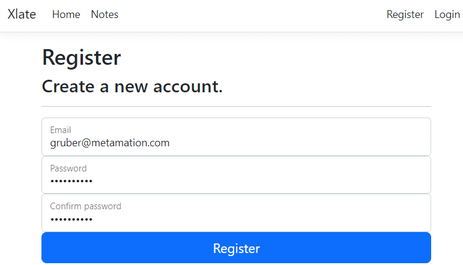
You will first need to create an account to interact with the translation services. Open the web application and switch to the self-signup Register screen. Enter the email and password to create the account. Xlate uses the default ASP Core identity services, and it requires that passwords contain an uppercase character, lowercase character, a digit, and a non-alphanumeric character. And the password must be at least 8 character long.
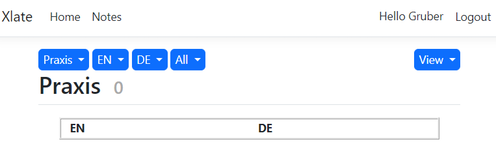
Click on Xlate button on top-left and switch to the home page. It should display the Hello user banner and the Logout button on the top-right corner.
Initializing the product database4
Download xl.exe and copy it to a folder included in the Windows PATH (E.g. C:\MM\Bin). (Unblock the download before copying. See build2 notes for the detailed xl.exe notes.)
Connect
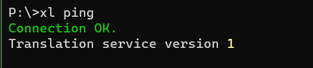
Switch to the command line and issue xl ping command to check the service connection. It should display the connection status as shown below.
CLI Sign-in
Once connected, use5 the xl list command to sign into the translation services. This command accesses the translation database to list the available products and pages. And therefore, it needs a valid user credential. Signing-in is a one-time process and the credentials are remembered after a successful sign-in.

Use xl signout to make the CLI forget the user credentials.
Initialize
Now use xl put command to seed the translation database with the local translation dictionaries.
C:\>xl put ?
xl put <Product> <SrcDir> [ImgDir]
Ex: xl put Flux "X:\Wad\lang" "Y:\Xlate\0"
The first ever xl put expects the product name, translation source path and the image source path.
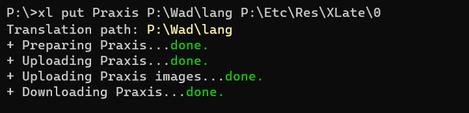
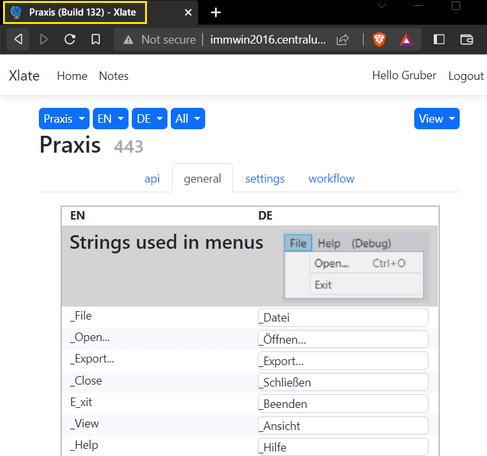
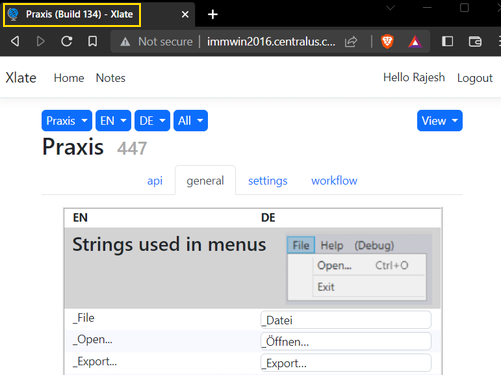
Refresh the translation page to view and update the translation entries. The page title (highlighted in yellow blow) displays the product build number.
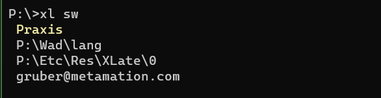
Like the credentials, the current product is remembered across the command sessions. You can use xl sw (switch) to check the current product, source directories and session user.
Synchronizing translation dictionaries
Getting the remote updates
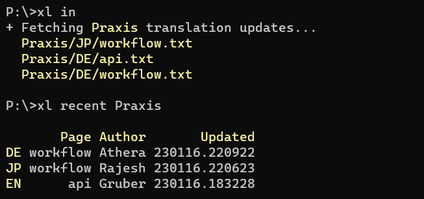
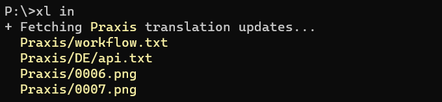
Once the translation database is initialized, the translation authors can signup and start editing various translation pages. The traslation owners can use xl in and xl recent commands to check the incoming and recently updated translations. These commands query the service for the updates and print them to the console.
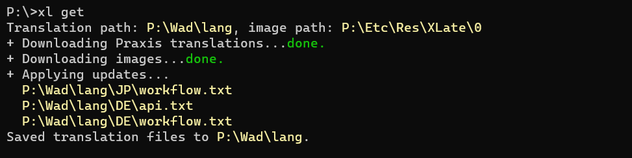
Use the xl get command to download and apply the remote changes to the local dictionaries.
Publishing (putting) the local updates to the remote
Typically the local translation dictionaries are updated when a new phrases (mostly English) are added or existing ones are updated during a new release. The updates may also include moving phrases between the pages or sections.
Use the xl out command to check the outgoing updates.
P:\>xl out ?
xl out [Product] [-diff]
Ex: xl out Flux

Description:
 Searches the translation root directory and prints the changed files.
 Defaults to the current root when no product argument is given.
 Use xl sw, xl get or xl put commands to set the translation root.

Options:
 -diff         Launches Winmerge to show the diff
Like the xl in, xl out is also a readonly command. It performs a diff between the local and a reference translation dictionary (created during the get or put). This command accepts a -diff option which runs a visual diff using the winmerge6.

Use xl put to publish the local changes to the database. Like the first run illustrated in the section above, the xl put updates the remote database with the local changes. Re-check the page title for the updated build number.
Misc. Changes
Adding/Editing Section Images
- Click on the ➕ button (or the image icon when available) to launch the image selection dialog.
- Select a PNG image using the Choose File button. The Save button should get enabled on a valid image selection.
- Click Save button to save the image to the database.
- The button icon should change from ➕ to an image icon 🖼 on a successful save.

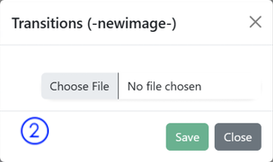
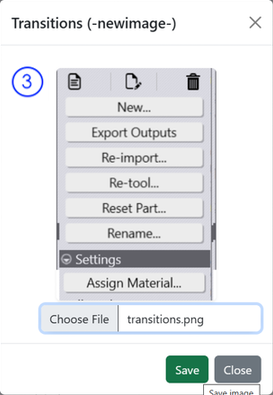
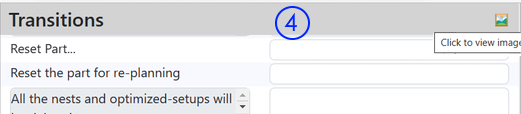
Along with the updated translation files, the xl in command should display the added images as well. Use xl get to pull the changes to the local directories.
View Options
View options can be used to toggle:
-
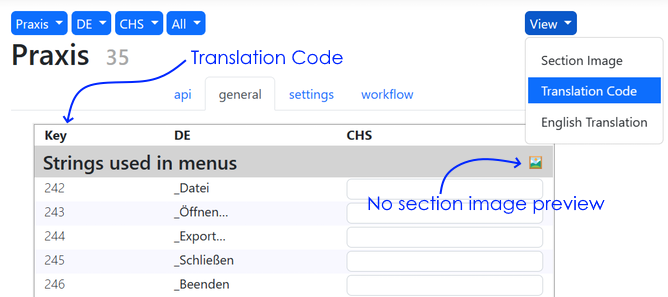
The section image preview: Instead of the image preview, a clickable, generic image icon is displayed. This icon can be clicked to view the enlarged section image.
-
The translation code column: When enabled, the translation codes are displayed in the first column. This column might be helpful sometimes for requesting the english translation corrections from the developement.
-
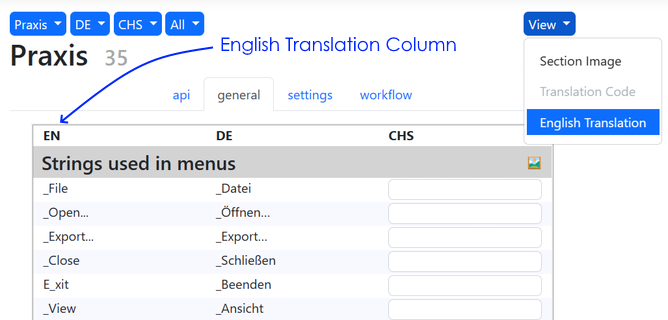
The English reference text: This option is available when a non-English language is picked as the translation reference. Selecting the English Translation option displays the english text as well along with the other language text. Translation Code is never displayed when this option is selected.
-
The translation product Owners create/update the reference English translations of a Product (Flux, Praxis, RA, Vulcan). The translation Owners are also the Authors by default. ↩︎
-
Locales are the target translation languages like German, Japanese, Spanish etc. assign with a unique language code DE, JP, SP etc. The translation authors translate the source language phrase (typically English) to these languages. ↩︎
-
The production translations are organized in multiple pages and the pages are further split in multiple sections. A section can optionally have an image illustrating the phrases from that section. ↩︎
-
Only for the translation owners. ↩︎
-
This can be any other command needing the translation database access. ↩︎
-
It expects winmergeU.exe in Windows path. Alternatively, provide winmerge path by setting the [Settings]\winmerge INI key in the ProgramData\Metamation\xlate\data\xl.ini file. ↩︎